Paneer Dum Kali Mirch

Hi folks, its always good to make a comeback and when you do with an awesome dish to share, it feels very nice. Today let me share a recipe for a fantastic curry “Panner Dum Kali Mirch”. Yes, you heard it right. We are going to see how to cook Paneer in Dum (i.e. in Oven) and with Kaali Mirch (Black Pepper). We all know everyone loves Paneer so let us treat them with some new way of cooking it. My Amma says, it is very important to make sure when to put which ingredient as that decides the final taste. Till date, it worked out fine for me. So let us see how to cook this amazing curry.

Ingredients:

  • 250 gm Fresh Paneer (Cottage Cheese)(Cut into pieces of triangular shape)
  • 2 Medium sized Red Onions (Chopped into cuboids, and then layers separated)
  • 4 Medium sized Tomatoes (finely chopped)
  • 1 Cup Fried Onion Paste (You get the fried onions in stores. Add in some hot water and churn into thick paste)
  • 3/4th Cup Cashew Nut cream (OR soak 1/2 cup Cashews in 1 cup hot milk and then churn to smooth paste)
  • 3 tbsp Ginger-Garlic-Green Chilli paste (Freshly made in mixer. Avoid store bought)
  • 1/2 tsp Turmeric Powder
  • 1/2 tsp Coriander Powder (Dhaniya Seeds powder)
  • 1/4 tsp Kashmiri Red Chilli Powder
  • 1 tsp Garam Masala
  • 2-3 tsp Black Pepper Powder (Freshly Crushed)
  • 2 tbsp Ghee (Clarified Butter)
  • 1 inch Cinnamon Stick (take 2 pieces)
  • 4-5 Green Cardomom
  • 3-4 Cloves
  • 1 Bay Leef
  • Salt as per taste
  • 1 tbsp Cooking Oil
  • Some strands of Kesar (Saffron) and some chopped Coriander leaves for Garnishing)

Preparation Steps:

I would explain steps in three phases as it becomes easier for me and for you reader to remember as well.

Phase 1:

  • Heat a wok in medium flame along with oil. When the oil is heated, add in chopped onions. Saute them. Cook them only till they get softened up. No need to wait till they get golden colored.
  • Now add in chopped tomatoes and saute for a while. Cover the wok with lid. In about 8 minutes, the Mixture would turn pulpy or would become smooth.
  • Now add turmeric powder, red chili powder, coriander powder, garam masala, 1 tsp black pepper powder and saute for about a minute. Turn off the flame and let the mixture cool down.
  • Now churn the cooled mixture into a very fine paste. You may add some water to assist with grinding. But do not add too much water. Remove the paste into a bowl and keep it aside.

Phase 2:

  • Clean the wok and in the same wok, add in ghee and heat in medium flame. Add in Bay leaf, Green cardamom, cloves and cinnamon sticks. Saute them gently till the flavor is released into ghee. Takes about 45 seconds.
  • Now add fried onion paste to the wok and saute it nicely for about a minute. Add it ginger-garlic-green chili paste and saute the mixture well until you see ghee oozing out a bit from the sides of the mixture.
  • Now add in Cashewnut Cream and again saute the mixture nicely. You can reduce the flame and let the cream get cooked. Take caution to not let the mixture stick to bottom of wok. In about 4-5 minutes you would see ghee oozing.
  • Now add 1tsp of black pepper powder and saute the contents well for about 1-2 minutes.
  • Now pour the onion-tomato-dry spice smooth paste to the wok. Nicely mix the contents well for about 2 minutes. You can add a cup of water depending on how thick you want the gravy to be.
  • Add salt to taste and mix well. Add in chopped paneer to the gravy and stir for about 4-5 minutes. Turn off the flame now.

Phase 3:

So we cooked the curry now. But what is the purpose of adding the literal DUM in the curry name. Here is important phase. We are now going to cook the curry on DUM. That is we are going to seal it and bake it. There are different ways we can do it. But I used my Romertopf Glazed Clay cooker pot. If you do not have clay pot with lid, then also it fine.

  • Transfer the curry into Clay pot. Sprinkle little bit black pepper powder. Garnish it with chopped coriander leaves, strands of kesar. Close the lid of pot. Seal the joint between pot and lid with aluminum foil.
  • Now place the pot in pre-heated oven at 180 degree Celsius and bake for about 25 minutes.

Alternate Options for simulating DUM:

Heat a flat iron pan (Tawa) on high heat. Seal the Wok in which you cooked the curry with aluminum foil and cover the wok with its tight lid above. Now place the sealed wok on top of the heated pan. Lower the flame to medium. And leave the setup as is for about half an hour.

So exactly 25 minutes over and now our curry is cooked nicely. Wait, do not open the pot or wok now. Open it while serving. You can some cream if you want while serving as well.

Concluding Remarks:

Serve the curry with Garlic Naans OR Chapathis OR Parathas OR you can serve along with jeera rice as well. Folks, do try this yummylicious curry at home. I am sure, you would get tons of praises at home and what else a cook needs. Loads of praise as it motivates. I hope you would love this curry and pour in your thoughts for the same. Until then signing off and would be back with another awesome recipe.


Khandeshi Vangyache Bharit

Hi Guys!!! Hope the long weekend was enjoyable for all of you. As it goes with the trend of my blogging, today, I would like to present one more awesome curry option. We all might have heard about Bharta OR Bharit which is made from baked egg plants. But there are varieties in ways this curry is made. My Amma makes it differently and it has an awesome taste to it. But the one that we would share today is of different style. It would have different taste as well and a bit spicy. It is called as Khandeshi Vangyache Bharit. Its popular from western part of Maharashtra. So let us see how to make it.

Ingredients:

  • 2 Big Sized Egg Plants (Bharta Baigan)
  • 8 Pods of Garlic

[Pre-heat oven at 400 F for about 6 minutes. Prick each Egg Plant at 4 different places and insert each garlic pod in each hole. Coat each of the egg plant with some oil and make sure to put a drop of oil on those garlics as well. Place them on a baking tray and then bake them for about 1 hr 20 min at 400F. When Done, remove them, cut their crowns off and peal the burnt skin off and then mash them well with masher or with hand on a bowl (Don’t Grind). Mash them with those garlics intact.]

  • 1+1/2 cups of Finely chopped Spring Onions [Do not exclude green leaves]
  • 5-6 Green Chillies [Finely Chopped]
  • 3 tbsp Roasted Peanut Powder
  • 2 tsp Coriander Seeds (Coarsely ground with pestle)
  • 1+1/2 tsp Garam Masala
  • 1 tsp Red Chilli Powder (May lessen or increase as per how spicy you want)
  • 1 tsp Aamchur Powder (Dry Mango Powder) [Optional]
  • 1 tsp Cumin Seeds
  • Some Curry Leaves
  • Some chopped Coriander Leaves
  • Salt to taste

Preparation Steps:

  • In a non-stick kadai, heat about 2 tbsp oil on a medium flame and when heated, add cumin seeds and let them splatter. When done, add the chillies and let them get cooked and then add spring onions and curry leaves. Saute for about 30 seconds and then cover with lid.
  • When the onions get cooked, add peanut powder and saute for about 1 minute and then add dry spices except crushed coriander seeds and aamchur powder. Saute for about a 1 minute so as the spices get cooked.
  • Now, add mashed egg plants and saute well so as the spices and contents are well mixed. Add required amount of salt and now also add crushed coriander seeds. Saute well and then cover the kadai with a lid. Reduce the flame to medium-to-low. Keep sauting at an interval of 4-5 minutes. Cook the curry for about 10-15 minutes like this. You would see that the water content if any would not be there by now and that the curry would start to become dry and leave the base of kadai. There would be some oil coating on it. At that stage, put off the flame and remove the kadai from stove.
  • Add aamchur powder and chopped coriander leaves and saute well. Our Khandeshi Vangyache Bharit is now ready to be served hot.

Concluding Remarks:

I hope the preparation steps are easy for you all to try. The aroma of mashed egg plants with garlic along with crushed coriander seeds and peanut powder would sure make the family hungry. Also we have spring onions and curry leaves to bring that fresh green taste. Serve the curry with Phulkas or chapathi and have a contented lunch or dinner at home. BUT please don’t forget to send your feedback through WP. Until then signing off with a promise of coming up with delightful recipes.

Shrikanth Krishnamachari


Bharke Bhindi

Hi folks and fellas!!! Last time I shared a sweet dish and hence in keeping with the trend of my blogging, this time I would like to present a curry recipe. This curry is also awesome in lot of ways like cooking style, etc. Yes, we are going to see a lady finger based recipe. It is called as Bharke Bhindi (or Stuffed Bhindi). Sounds awesome right but it has its own challenges. Again, I can never be able to match my Amma when it comes to cooking. But whatever I learnt from her in this area is worth sharing. Let us see how to make Bharke Bhindi now.

Ingredients:

  • 2-3 medium sized Red Onions (Pureed into fine paste. Please do not add water)
  • 2 Medium Sized Tomatoes (Pureed)
  • 1/2 Kg Bhindi (Lady Finger) (Make sure to select small and tender bhindis) (Chop the crown off and slit it across the hight to form a pouch)
  • 2 tsp Garam Masala
  • 1/2 tsp Turmeric Powder
  • 1/2 tsp Red Chilli Powder (Can increase as needed)
  • 1/2 tsp Dhaniya Powder (Coriander seeds powder)
  • 1/2 tsp Aamchur Powder (Dry Mando Powder)
  • 1 tsp Besan (Chick Pea Flour) (Turn into paste by mixing in little water)
  • 2-3 tbsp dry Coconut powder (Can be replaced by roasted peanut powder)
  • Salt as per taste
  • 1/2 tsp Fine Sugar
  • 2-3 tbsp Cooking Oil

Preparation Steps:

  • In a non-stick Kadai, heat oil and when heated, saute red onion paste till the paste gets well cooked and turns brownish in color. You should see that all the watery content from the onion paste might have gone and also an oil coating can be seen on it now. At this stage, add the besan paste to it. This would cause thickening of the stuffing that we need. Saute well again for about 2-3 minutes.
  • Now, add tomato puree and again saute the contents and cook them until all the water is evaporated. Again, you should see a thick paste with some oil coating.
  • Now, add dry spices mentioned above except the aamchur powder. Add salt, coconut powder and sugar and then mix the content well. Cook for about a minute or two and then put off the flame and remove the kadai from stove. Now add aamchur powder and mix well again. Adding aamchur powder later will avoid stuffing getting bitter. The stuffing is ready and we should allow it to cool down from about 10 minutes.
  • Now, fill each lady finger pouch with required amount of stuffing and keep placing them in a bowl when done. Don’t worry if some stuffing is left unused. Now, in the same kadai, heat 1 tbsp oil and when heated, put the left-over stuffing and spread it well. Now add the stuffed bhindis and reduce the flame to medium-to-low flame. If needed you can sprinkle some salt to taste. Cover the kadai with lid and keep watching after every 3-4 minutes.
  • The moisture from Bhindi and the heat is in itself enough to cook the curry. So there is no need to fry the bhindi prior to stuffing. It should take roughly 10-12 minutes to get it cooked in that flame. When cooked remove it in the same bowl and serve it by either garnishing it with some chopped coriander leaves or dry peanut powder or some coconut powder.

Concluding Remarks:

Guys!!! we just made an awesome curry which can be used as a side for Phulkas or chapatis or bhakris. The tenderness of bhindis is vital for this curry. And then the stuffing off-course would be very very tasty if cooked for right amount time as you feel. And while eating, each and every bite would be super-awesome. So please try this at your home, and then please review it and provide your feedback to me via WordPress.

Shrikanth Krishnamachari

Ganesh Halwa / Mumbai-Karachi Halwa

Hello guys!!! Today I would want to share an awesome sweet dish recipe which, I am sure you would want to try the moment you have read this. The fact about this dish is its called “Ganesh Halwa” in Nagpur (my hometown) and Mumbai Halwa or Karachi Halwa (in Karachi Bakery) or Mumbai-Karachi Halwa (nice to see two cities joining together). Importantly, its Sindhi dish in the first place. And one more fact, this recipe tests your patience to the hilt. So let us now see how to make it.

Ingredients:

(Please try sticking to the quantity)

  • 1 cup Corn flour
  • 2 cup Sugar
  • 3/4th cup Ghee
  • 2+1/2 cups Water
  • 3/4th cup Water
  • 1 tsp Cardamom powder
  • 1/2 cup Cashew-nut pieces (roasted OR slightly sauted in a tsp of Ghee)
  • 1/2 cup Pistachio pieces
  • Juice out of one lemon.
  • 1 pinch of Orange or Red or Yellow food color (I used deep orange color)

Preparation Steps:

(For the entire time that you are cooking this dish, keep the flame between medium to low)

  • Place a non-stick kadai in medium-to-low flame, and prepare the sugar syrup out of 2 cups of sugar and 3/4th cup of water. We certainly do not want any kind of consistency here. So as soon as all the sugar has molten and when you see that the syrup is boiling, add the lime juice to the syrup. Lime juice would prevent the crystallization of sugar.
  • In the time that syrup is getting ready, in a bowl, mix corn flour with the help of 2+1/2 cups of water in a way that there are no lumps in it. When the syrup is ready, slowly mix the corn flour liquid that we made and with the other hand, keep mixing the contents to avoid lumps.
  • From here on, its the game of patience. Without increasing the flame, keep stirring the contents slowly and steadily to not allow corn flour to settle down and get burnt.
  • At one stage the contents would thicken and would start become like a paste. When it completely thickens and turn into mushy paste, start adding Ghee one table spoon at a time. After adding each spoon of Ghee, mix the contents well so as ghee is absorbed. This would now give the halwa a smooth texture.
  • After the addition of Ghee, add cashew-nut pieces, cardamom powder, pinch of food color and keep mixing the contents. At one stage you can see the Halwa getting a bit transparent in a color. When that starts to happen, we are nearing the final stage of preparation. Continue mixing the contents for another 5-7 minutes.
  • Now, put off the flame and empty the contents into some tray which is well greased with Ghee. Top the halwa with pistachio pieces and allow the halwa to get well set for about 3 hrs.
  • After roughly about 3hrs, cut the halwa into desired shapes and Bingo!!! we have our Ganesh Halwa ready to be served.

Concluding Remarks:

So wasn’t that easy guys. Although it needs more patience and indeed sweet dishes come out good when we make it with love and patience. Do offer it to GOD as I always do. Since we are not allowing the sugar to get crystallized and the amount of time that we are setting it, will have that characteristic rubbery texture to it. So next time, Oh, why wait for next time? Try this recipe at home and please please and please, send your feedback my way through wordpress. Until then signing off to come with more recipes.

Shrikanth Krishnamachari

Vegetable Dum Biryani

Off all the rice varieties out there, there is something special about biryanis. Just by the suffix there are various varieties of this dish. Today, I would like to share the recipe and talk about Vegetable Dum Biryani. The dish is rich, aromatic and truly regal in appearance. What goes in as ingredients is also something not that common in all dishes. Also, the word “Dum” is rendered because of its unique preparation style, which I would discuss below.

Ingredients:

I will list them as separate sub-sections for ease.

For Biryani Masala:

In a mixer, grind to paste the below ingredients with minimal use of water. The paste should be very fine.

  • 2 Cinnamon sticks (2 inch each) [Dal Chini]
  • 1 tsp Black Pepper
  • 4-5 Green Cardamom [Hari Elaichi]
  • 3-4 Cloves [Laung]
  • 2-3 Dry whole red chilli

For Cooking Basmati rice:

Cook rice along with below mentioned ingredients. Make sure that Basmati rice is not over cooked. It should be approx. 90% cooked or just about to get fully cooked. I cooked it in microwave for better control. Drain the excess water after cooked and keep the rice aside.

  • 2 cups of Basmati Rice
  • 2 bay Leaves [Tezpatta]
  • 1 Cinnamon stick
  • 3-4 Green Cardamom
  • Salt as required
  • 4 + 1/2 cups of water.

For Biryani Gravy:

In a bowl, take all the chopped veggies. In a mixer, take curd, garlic pods, green chillies, ginger, cashew-nuts and salt blend them to a fine consistency. Now pour the mixture on top of veggies and mix well so they get coated with mixture. Add Garam masala and again mix well. Now cover the bowl with a lid, and let the contents get marinated for about an hour.

  • 1 Green Capsicum [Chopped into cuboid shaped pieces]
  • 2 medium sized Carrots [Chopped into medium sized pieces that can get cooked easily]
  • 1 cup Green Peas
  • 1 Medium sized Red Onion [Chopped into cuboid shaped pieces and layers separated]
  • 2 medium sized Potatoes [Chopped into medium sized pieces that can get cooked easily]
  • Cauliflower [10-12 medium sized pieces that can get cooked easily]
  • 1 medium sized Red Onion [Pureed]
  • 1+1/2 cups of Fresh Curd
  • 1/2 cup of Cashewnuts
  • 3-4 Green Chillies
  • 1+1/2 inch Ginger stick [Chop them a bit]
  • 4-5 Garlic pods
  • 3 tsp Garam Masala
  • Salt as required
  • 2 tbsp Sunflower oil
  • 1 tsp Cumin seeds
  • 1 tsp Mustard Seeds

For in between Layers of gravy and rice:

  • 15-20 filaments of Saffron (Kesar) [OR 1/2 tsp of Turmeric powder] mixed in 1/2 cup of warm milk.
  • 1/2 cup of melted Ghee
  • 1 Medium sized Red Onion which Caramelized by deep frying in oil (Do not over burn). It should look brown in color.
  • 1/2 to 1 Cup of chopped Mint Leaves.
  • Some Cashew-nut pieces.

Preparation Steps:

As with ingredients, I would explain the preparation steps in sections for ease. We have the rice cooked and the procedure for gravy half done. Let us complete the preparation then.

How to prepare gravy?

In a Kadai, heat oil in medium flame and when heated, add mustard seeds. Let them splatter. When done, add cumin seeds and let them splatter too. Now add pureed red onion and saute well till it gets cooked. Now add the biryani masala paste which we prepared and mix well. Let it get cooked for about 1 minute but keep sauting well. Don’t let it get burnt. Now add half of the marinated contents to the vessel and mix them once. And then add the other half and again mix and saute well. Now, we need to cook the veggies till they get tender and mostly cooked. So add a cup of water and mix the contents well. Close the vessel with lid and keep sauting as and when required, else, the gravy would get burnt at bottom. After about the 20-25 minutes the veggies should get cooked, if not allow some time. When done put off the flame but do not remove the lid.

What is Dum and how to simulate it for our recipe?

Traditionally, a dum preparation is done on clay vessels which are also covered with clay lids as they can retain the moisture inside and trap all the heat and flavor inside. We can simulate the same behavior even if we do not have clay vessels. So let us first prepare the layers that we need. I used thick glass container.

So in a thick glass container,

1. Add some amount of cooked rice as the first layer.

2. Now, add some amount of gravy we prepared in away, that it covers the underneath rice layer. Again add some rice layer so as it covers the layer of gravy. Now, to this layer of rice, add some saffron mixed milk in a circular manner. Add some caramelized onion pieces. Add 2 tsp of ghee in circular manner. Spread some chopped mint leaves.

3. Continue step 2 but make sure to end up with the layer of rice on top. On this top layer, spread some cashew-nut pieces, garnish with saffron milk, caramelized onions, mint leaves and ghee.

4. Now wrap the top of glass container fully with aluminium foil in a manner that no space is left for moisture to escape. Preheat the baking oven at 180 Degree C and cook the contents for about 20-25 minutes in the same temperature.

This is one way of simulating dum preparation. Another way is heat a flat pan (tawa) on a high flame for about 15-20 minutes. Prepare the layers in flat copper based vessel and cover the vessel with lid. Seal the lid with dough kneaded out of wheat flow. This would ensure that flavor and moisture is trapped inside. Now place, this vessel on top of heated tawa and reduce the flame to medium. Let the contents get cooked further for about half an hour.

Whichever way you follow, the biryani is now cooked and and you can serve it hot with layers intact along with some raita or salad on side.

Concluding remarks:

Although it takes some amount of time, but if you can manage to do things in parallel, time can be reduced. Nonetheless, it is one amazing dish to prepare on weekends and enjoy with family and friends, especially during festive occasions. So friends, I urge that you do try this at your home and do let me know what do you feel about this. Your feedbacks are always welcome.

– Shrikanth Krishnamachari

Aval Kesari (Halwa made from Poha)

Festival time and hence a lot of sweet dishes or deserts. Today we would talk about a recipe that is not that common at all. I understand you all might have heard about Kesari or Soji ka Halwa but wait a second this is not normal kesari at all. What is different then? Actually it is Kesari or Halwa made from Poha (or Rice Flakes). It would have all the necessary qualities to be called as Kesari. Let us see this awesome recipe.

Ingredients:

  • 1 cup Poha (Rice Flakes) [Use sieve to clean the Poha of unwanted particles]
  • 1/2 OR 3/4th cup Sugar (Based on what amount of sweetness you want)
  • 2 tbsp Ghee
  • 1+1/2 tsp Cardamom Powder
  • 5-6 Cashewnuts (Broken into pieces)
  • 10-12 Kismis (Raisins)
  • 10-15 fragments of Kesar
  • 1 pinch of Orange-Red Food Color (Dissolved in 1 tbsp of water)

Preparation Steps:

My mom says, Kesari comes good and tasty with the right amount of ghee and sugar as they are key in this dish and the amount of time you cook the ingredients is also important.

  • Boil a cup and half of water and then let it be aside.
  • In a small Kadai, heat ghee in medium flame. When heated, add cashews and saute them untill they get a slight golden texture. Remove the cashews in a plate and repeat the same step with Raisins and saute them till get smooth texture. Don’t burn them and when done remove it in the same plate.
  • Don’t, waste the ghee that is there in Kadai. In the same Kadai, saute the poha till they get roasted in Ghee. If they get roasted well, you would see a golden texture around the edges and a nice aroma of poha roasted in ghee would be emanating.
  • At this stage, put off the flame and keep the Kadai with poha aside. Pour the hot water over the roasted poha and let it soak in hot water for about 15 minutes. Since, it is hot and roasted it would imbibe the hot water and get softened.
  • When 15 minutes are over, again place the kadai with softened poha on medium flame. Add sugar to it and keep suating the contents continuously BUT YET carefully. We do not want to break the pohas completely. It would get broken, but it should not get powdered. So be careful.
  • After adding sugar, you would see the contents getting liquified but its okay. Keep sauting. After about 2-3 minutes on medium flame, add the dissolved food color and Kesar filaments and again keep sauting the contents. Contents would take in the required color for Kesari.
  • After some time, you can see that the contents would be getting reduced in quantity and would be thickening or leaving the surface of the kadai smoothly. When you get the desired thickness as shown in the picture below put off the flame and add the fried cashews and raisins and mix them once.
  • Our Aval Kesari is ready to be served.

Concluding Remarks:

So friends, festival season is not over yet. Don’t ponder what different to prepare for offerings in prayer. Try this simple yet delicious sweet dish at home and I am sure that your friends and family would love it and yes they would ask for the recipe too. You also know what I need from you all and those are feedbacks on how can I improve OR your experiences on trying the recipe. Signing off now till I come with another interesting recipe.

Shrikanth Krishnamachari

Mirchi Wali Curry

Somedays, we often stumble upon some situation where we think what different can be prepared at lunch or dinner. Probably, common vegetables that we make often become monotonous. Or even for that account, at times even paneer recipes would become common. So, what different can we try? Today, I would walk you through one of my recipe which is surely uncommon and unique it the manner how it is prepared. Today, we would see how to prepare Mirchi Wali Curry. Its a combination of Mirchi Wadi (one of my previous recipes) in the gravy which is enhanced version of salan (another hyderabdi side for biryanis). So let us see what difference can we make to our routine menus.

Ingredients:

One of the key ingredients, of course, the Mirchi Wadi (Jalapenos based preparation) is already on my blog. So ingredients and steps to make Jalapeno Wadi can be learnt from the link : https://krish1631988.wordpress.com/2014/03/18/mirchi-wadi

For Curry:

  • 1/2 cup Shredded Coconut (Can use dry one or freshly grated wet coconut)
  • 1/4 cup Groud Nut (Roasted and peeled off)
  • 1/2 cup Curd
  • 2 Small Red Tomatoes (Pureed) (OR 1 Big Red Tomato puree)
  • 3-4 Garlic Pods
  • 3-4 Green Chillies
  • 1 inch Ginger Stick
  • 1-1/2 tsp Cumin Seeds
  • 1-1/2 tsp Coriander Seeds
  • 1-1/2 tsp White Sesame Seeds
  • 1 tbsp Garam Masala
  • 1 tsp Turmeric Powder
  • 1 tsp Red chilli powder
  • Some chopped coriander leaves
  • Some Kasuri Methi
  • 5-6 Curry Leaves
  • 3-4 tbsp oil
  • Salt to taste

Preparation Steps:

  • Prepare Mirchi Wadis as directed from the above link.
  • Curry can be prepared in parallel when the wadis are getting cooked. In a pan heat dry roast cumin seeds, coriander seeds and sesame seeds on medium flame for about 4-5 minutes. Keep sauting them in between. Do not burn them. When done, set aside in a mixer jar.
  • In the same pan, heat 2 tsp oil on medium flame and when heated, saute the green chillies, garlic pods and chopped ginger stick for about 1 minute and then add the dry coconut and again saute for about another minute. Do not burn them. When done add them to the same mixer jar.
  • Now grind the contents in mixer jar along with curry leaves, roasted ground-nuts and curd and add a little bit water while grinding. Grind the contents to paste.
  • Heat oil in kadai on medium flame. When heated, add mustard seeds and let them splatter and then add some cumin seeds and let them splatter too. When done, add the paste that we prepare in the mixer. Saute the contents well in kadai and reduce the flame a bit.
  • Cook the mixture till you get to see oil oozing out. You might need to saute the mixture as and when.
  • When you can see oil surfacing a bit, add the tomato puree and further saute the contents and let the tomato puree get cooked. Once again you might have to cook until you could see oil re-surfacing a bit.
  • At this stage, add garam masala, turmeric powder and red chilli powder and mix the contents well. Add some water (based on how much thick you want the curry to be). Add the chopped coriander leaves and kasuri methi (crush them with palm before adding). Add salt as per taste. Mix the contents well. Cover the Kadai with a lid and cook the gravy for about 5-6 minutes. Keep sauting as and when needed.
  • Now at this stage, add the Mirchi Wadis to the curry, apply some gravy on them and again cover the lid and cook for about 1-2 minutes so as the wadis take the flavor of the gravy.
  • Put off the flame and our Mirchi Wali Curry is ready to be served.

Concluding Remarks:

Guys, hope you found the recipe and explanation simple and that you would sure try this at home. Isn’t this recipe unique and uncommon. It has the Stuffed Jalapenos in it which has the jalapeno flavor and then a curry which is unique in style that any other curries. So please try this at your home, enjoy it, and please let me know what you think about it through the same blog. So now, signing off untill I come up with some more awesome recipes.

– Shrikanth Krishnamachari

Shahi Tukda

Desert becomes an important menu item when you call guests at home. My mom says a desert has to be such that when the guests leave they should have that taste lasting with them. So let me take you through a recipe of one such desert and yes its coming straight from Hyderabad. I have had it couple of times and was simply awesome. Today we would see the recipe for Shahi Tukda. Yes!!! you heard it right. Shahi mean Royal and Tukda means Piece in colloquial language in India, thus making it to be called as Royal Piece. We would be preparing two separate dishes and then combine them to one. So let us swarm through the recipe.

Ingredients:

For Rabdi:

  • 5-6 Cups of full cream milk (or Whole MIlk)
  • 1 tbsp Milk Powder
  • 1 tbsp Milk Masala Powder (Get the Everest one)
  • 1/4th cup of shredded almonds
  • 1/4th cup of shredded pistachios
  • 1 tsp of cardamom powder
  • 1-2 tsp of Rose water
  • 1/2 – 3/4th cup of Sugar (can add or reduce as per taste)
  • 10-15 Kesar filaments.

For Tukdas:

  • 1/2 Cup Sugar
  • 1/4th Cup water
  • 1/2 tsp cardamom powder
  • 1 tsp Rose water
  • 2 Slices of White Bread

For dressing:

  • 1/2 tbsp shredded almonds
  • 1/2 tbsp shredded pistachios

Preparation Steps: 

I would divide this section into 4 parts that would see below.

How to prepare Rabdi? [Prepare it a night before so that it could be served cold]

  • Take a Kadai with thick base and wide mouth. If the base is thick and the mouth is wide, rabdi would get prepared faster. Also, while making rabdi, a constant attention is advised so that we do not burn the milk at the bottom of kadai.
  • Boil milk in this kadai in medium flame. When you see the first boil in the milk, i.e. when you see the froth and skin getting formed or when milk starts boiling, add milk powder to it. Adding milk powder, would help infaster thickening of the milk.
  • After about 1-2 minutes, add the milk masala. Milk masala normally has required mix that add flavor to rabdi.
  • Keep stirring the milk in an interval of 1 minute or as and when you see the froth or skin forming on top of it. Don’t remove the skin, just clear the surface so as the milk continues to boil and the skin (malai) helps in thickening the milk. Keep scraping the sides of kadai as we do not want to miss any cream formation there.
  • At some point you would see that milk has reduced to less than half the initial quantity, add kesar, shredded almond and pistachios, sugar, rose water and cardomom powder. Stir the contents well and continue to cook the milk to make it even thicker.
  • At some point, if you see that milk has reduced to the consistency, which is slightly lesser than what is showed in the picture, put of the flame. Are rabdi is prepared. Let it cool down for about 15-20 minutes and then refrigerate it. Your half the task is done.

How to prepare Bread squares?

  • Take a slice of bread and separate out the crusts by cutting them gently. Now, cut the slice into 4 squares.
  • We need to fry the bread pieces ,for which, you can use oil but to be healthy I toasted them on pan with some ghee. You can use either oil or ghee but I would prefer ghee and it adds to flavor. So just toast the bread pieced so as they turn golden-brown in color from both sides. Remove the pieces and place them on a tissue paper.
  • Repeat the same step with other slice as well. So we have our toasted bread pieces ready.

How to prepare Sugar syrup? [Can be done in parallel to previous step]

  • This is very important step and has to be done with care. There is a stage called as Single Thread Consistency in case of sugar syrup. So when we reach this step, then only we can use it to make tukdas other wise the bread would either get soggy or would get toughened because of syrup.
  • In a small utensil or small kadai, dissolve 1/2 cup sugar in 1/4th cup water. DO NOT ADD additional water. Now allow the mixture to boil for sometime till it boils as shown in below picture. When it is boiling like that, take some syrup in a spoon, cool it a bit and then put a drop between the thumb and index finger and see if you could see a single thread when you start moving fingers. That’s the single thread consistency.
  • Put off the flame and add cardamom powder and rose water to the syrup and mix it well.
Single Thread Consistency State

How to serve Shahi Tukda (Our Desert)?

  • We have bread pieces ready, sugar syrup ready. So now, take a single toasted bread piece and immerse it in sugar syrup bowl so as bread soaks the syrup well from both the sides.
  • With the help of tongs remove the sugar coated bread piece and arrange it on a serving plate. Follow the same with all the bread pieces.
  • Now, apply the cold rabdi (Take out from refrigeration and hour before, and mix it well, once) over the sugar coated bread tukdas as shown in picture.
  • Just sprinkle the shredded almonds and pistachios for garnishing and serve it with passion to your guests.

Concluding Remarks:

So guys, I am sure you would have loved the recipe, and would try this at home. Please do try. Don’t worry about calories, as it is okay to have some calories in between the dieting regime. This royal dish would sure make a lasting impression on your guests and would ask the recipe for sure. Do try and enjoy the recipe and yes feedback are most welcome as that would help. Signing off till I come up with one more recipe to my blog.

– Shrikanth Krishnamachari

Saoji Patodi Rassa

Lets travel to Maharashtra this time. Talking of food culture in this state, it has been variegated all through out the years. One can find a same dish being prepared in different way in different parts of the state. Today, we are going to see once such recipe which is also popular in the state and is served in different way all across the state. Its called Saoji Patodi Rassa. If you think what does saoji mean, then, it is very simple. Saoji curries would be a bit with extra oil (most cases you would see oil floating over the curry) and yes it would be spicy as well as hot in nature with more amount of red chilli powder in it. When it comes to taste, nothing beats the saoji curries. So let us today see the preparation of this curry.


Ingredients:

For Patodi: 

  • 1 Cup Besan (Chick pea flour)
  • 2 tsp Ajwain Seeds (carom seeds)
  • 1 Pinch Baking Soda
  • Salt as per taste
  • 1 tbsp Oil
  • 1 tsp Turmeric Powder
  • 1 tsp red chilli powder
  • 1 cup water

For Saoji Curry (Rassa)

So here’s the trick. Check the contents of garam masala that you always use at home or ask moms who prepare that for what contents are added to the garam masala. My Amma prepares garam masala with most of the whole spices that we would want in this curry. So the advantage is if you use such garam masala, your job becomes much more easier and you can take 3 tbsp of Garam Masala. If not take a note of below ingredients.

Whole Spices

  • 3/4th cup Dry Coconut (grated)
  • 1 Cinnamon stick (Dalchini) (2 inches long. Break into pieces)
  • 3-4 Whole Red Chillies (Break into pieces)
  • 2 pieces of Nutmeg (Jaifal)
  • 1-1/2 tsp Fennel Seeds (Sauf)
  • 1-1/2 tsp Cumin Seeds (Jeera)
  • 2-3 Black Cardomom (Badi Elaichi)
  • 1 tsp Black Pepper (Kali Meeri)
  • 2 Star Phool (Star Anise)
  • 2 Whole bay Leaf (Cut into pieces)
  • 2 tsp Dhaniya Seeds.
  • 2 tsp Khas Khas (Poppy Seeds)
  • 4-5 Cloves
  • 1 tsp Mustard Seeds (Sarson) (Take bigger ones)

Other Ingredients

  • 3 Medium Sized Onions (Cut them into halves, then cut each half into 4 further pieces and then separate out the petals.)
  • 5-6 Garlic pods
  • 2 inch Ginger (Chopped finely like match sticks)
  • 1 tsp Cumin Seeds
  • 1 tsp turmeric powder
  • 2-3 tsp Red Chilli Powder (May reduce or increase as per taste. But Saoji needs to be hot)
  • Salt as per taste
  • Some chopped Dhaniya Paththa
  • 1 to 1-1/2 Cup Oil (May reduce but normally Saoji is bit oily in nature. I used a cup of oil)

Preparation Steps:

How to make Patodi?

  • In a bowl, take besan and to it add all other ingredients from the list for Patodi. Make sure to crush ajwain seeds with palm before adding. It gives flavor. Now add a cup of water, and mix well into a consistent paste.
  • Grease a steel vessel with oil and it should be bigger enough to contain all of the paste. Steam cook the paste in a cooker for about 20-25 minutes and then keep it aside to cool down.
  • When cooled, just invert the vessel into chopping board and tap 3-4 times. Cut the cooked patodi into square tiles as we cut paneer. Keep the pieces aside in the same vessel.

How to prepare spice paste?

  • Dry roast each of the ingredients from the Whole Spice list one by one on medium heat. While roasting Khas-Khas and Coconut, take special care as you don’t want them to get burnt. In general, for all of them, try not to over-roast them.
  • After roasting each of the ingredient, put them into hot water (Have some hot water in a some vessel. Only 2-3 cup needed).
  • When all of the whole spices are roasted and then added to hot water, let them simmer in low flame for about 3-4 minutes. Then strain out all the water but do not throw this water. And then using blender, grind the spices into very fine and consistent paste. You can take help of some strained water in between, but try using less water. Keep the paste aside in a some bowl.

How to prepare the curry or rassa?

  • Deep fry the onion petals in medium heat till they become golden brown or well fried. Strain out all the oil content and grind them in blender into very fine paste.
  • Grind ginger and garlic into paste as well.
  • In a cooking vessel or kadai, heat oil in medium flame and when heated, add cumin seeds and let them splatter. Then add the ginger-garlic paste and saute for about a minute.
  • Now add the fried onion paste and just give a saute for about a minute and then add the spicy paste that we prepared. Mix and saute well for about 2 minutes and then add red chilli powder and turmeric powder to it. Saute well for 2 minutes.
  • Now add a cup of water (can also use the strained water from spices), salt as per taste and mix well and then let the curry get cooked in medium flame further for about 5-10 minutes. Since onions are fried, and spices are roasted and simmered in hot water, it would not take much time to get cooked.
  • At an interval of about 3-4 minutes, keep checking the curry so as it does not get burnt. If you want you can add some water but then cook for some more time until, you see oil coming oozing out of the curry. The oil should be red in color which is called as rogun and is typical of Saoji curries.
  • When the gravy reaches required amount of thickness and consistency, put of the flame and add chopped cilantros to it and mix once.
  • Our Saoji curry is now ready.

How to serve Patodi Rassa?

Arrange the patodi pieces in a bowl and then pour the gravy on top. You can also mix the patodi pieced with gravy and serve hot in a bowl. For bread varieties, you can serve Patodi Rassa with naans, chapathis or with Jowari Rotis of course with some onions and green chilli.


Concluding Remarks:

Am sure you would love this recipe and so, do try this recipe at home when you call your family friends for get together. This would sure take you to the state and particularly to Kolhapur or Nagpur where it is more famous. If you hard-core non-vegetarian, you can substitute patodis with chicken or mutton or eggs.

So what I need and you know that too. Please send across your feedback for this recipe and I would love to hear back from you, The Readers. Until then signing off.

– Shrikanth Krishnamachari

Khaman Dhokla

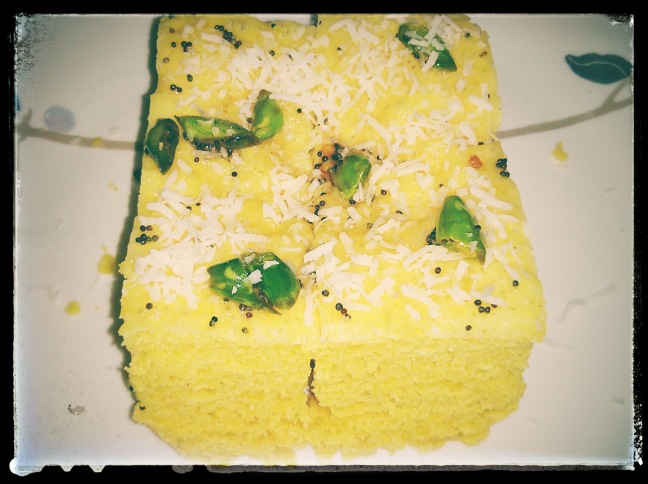
25th recipe in the blog and I thought it had to be some special recipe. One, of my friend, had this request saying “Krish, also do post some recipes without onions and garlic”. So, today, let us travel to the state of Gujarat. Oh wait wait!!! through the recipe I meant. Today, we would see how to prepare Khaman Dhokla. Yes, that is it today. Its one of the favorite snack recipe back in India.

Ingredients:

  • 1 Cups Besan (Chana Daal Flour)
  • 1 and 1/2 tbsp Semolina (Rawa)
  • 1 tsp Ginger-Green Chilli paste (Freshly ground)
  • 3 tsp Sugar
  • 1 tsp Salt
  • 1 and 1/2 tsp Eno fruit salt
  • 1/2 tsp Citric acid crystalized powder
  • 3 tbsp Oil
  • Some mustard Seeds
  • 2 Green chillies nicely chopped
  • 3 tbsp Dry Coconut (grated)
  • 1 pinch of Asafoetida (hing)
  • 1 and 1/2 cup of water

Preparation Steps:

  • Take besan in a mixing bowl and add semolina, citric acid crystals, sugar, salt and ginger-green chilli paste. Now, add a cup of water and mix it slowly (DO NOT MIX RAPIDLY) until we get a uniform paste.
  • Now add Eno fruit salt to the mixture and just pour 1 tbsp water exactly on top of fruit salt. It would bubble up. Now slowly mix the contents again for about 2 minute. The fruit salt and citric acid powder, would cause the paste to double in quantity.
  • Do not disturb the contents now and let it be aside for about 5-6 minutes. We want the paste to stand by itself.
  • Till then, grease any container with 1 tbsp oil. Make sure the container is not any wider that 6-7 inches in diameter. Also, set a pressure cooker or normal cooker with some amount of water and heat it on medium flame. Use some plate inside the cooker on top of which we would place the vessel with paste.
  • Now, pour the mixed paste slowly onto to the vessel. Place the vessel inside the cooker and cover the cooker with a glass lid or any lid which would let the steam out as we want our dhokla paste to be steam cooked. Cook the paste for about 15-16 minutes approximately.
  • After the stipulated time, remove the lid, and take out the vessel and let it cool for about 3-4 minutes. After that invert the contents onto some plate which would like a spongy cake. Cut the cake into pieces of desired shape and size.
  • In a span, heat 2 tbsp oil in medium flame. When heated, add mustard seeds and let it splatter. Now add pinch of Asafoetida and chopped green chillies to it. Saute for about 30 seconds. Put of the flame and after about 1 minute, add 3 tbsp of water to the oil. This is the tadka for dhoklas.
  • Adding water, would allow the dhoklas to get smoother while eating and you would not feel dryness when eating. Now, pour the tadka over Dhokla pieces and garnish it with grated coconut and coriander leaves.
  • Dhoklas are ready to be served.

Concluding Remarks:

Serve Khaman Dhokla with hot cup of tea or with some dates-tamarind chutney or any spicy green chutney. Enjoy this snack at home with your family and let your feedback come through wordpress. Till then, please please and please do wait for my next recipe to feature.

Shrikanth Krishnamachari